LAZY LOADING JQUERY TABS WITH ASP.NET
LAZY LOADING JQUERY TABS WITH ASP.NET
This article looks at efficient use of jQuery tabs when displaying data. Specifically, it covers how to lazy-load data, so that it is only accessed and displayed if the tab is clicked.
Lazy Loading is a well-known design pattern that is intended to prevent redundant processing within your application. In the case of tabbed data, there seems little point retrieving and binding data that appears in a tabbed area that no one looks at. So, this examples covers how to defer data access and display until the user wants it - which is defined by them clicking the relevant tab.
I'm going to use the same Web Service as was introduced in one of my previous jQuery articles, but I have added a new method to it which simply returns a collection of Cars that meet the Make criteria passed into the method argument:
[WebMethod]
public List<Car> GetCarsByMake(string make)
{
var query = from c in Cars
where c.Make == make
select c;
return query.ToList();
}
First we make sure that the correct Javascript files are referenced:
<script type="text/javascript" src="script/jquery-1.3.2.min.js"></script>
<script type="text/javascript" src="script/ui.core.min.js"></script>
<script type="text/javascript" src="script/ui.tabs.min.js"></script>
Then the next thing to do is to add some HMTL to the page to act as tabs:
<form id="form1" runat="server">
<div>
<div id="content">
<ul>
<li><a href="#tab0"><span>Ford</span></a></li>
<li><a href="#tab1"><span>Toyota</span></a></li>
<li><a href="#tab2"><span>Honda</span></a></li>
<li><a href="#tab3"><span>Audi</span></a></li>
</ul>
<div id="tab0"></div>
<div id="tab1"></div>
<div id="tab2"></div>
<div id="tab3"></div>
</div>
</div>
</form>
An essential part of the deal is CSS. I borrowed some for this example from Klaus Hartl, the originator of jQuery tabs who has used CSS Sprites, which he explains here. If you want to short cut like me, the CSS is available on the demo page which will be linked to later.
The HTML requires a container for the tabs, a bit like the ASP.NET AJAX TabPanel. In this example, it's the div with the id of content. The tabs themselves are represented by anchor tags within list items. The content for each tab is placed in a div. Once the CSS has been applied, creating a tabbed interface requires (as is usual with jQuery) just a line or two of Javascript:
$(function() {
var $tabs = $("#content").tabs();
});
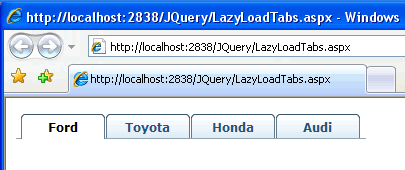
Running the page as it is gives this result:

However, at the moment, nothing happens when the tabs are clicked. Some more Javascript is needed, and this will be focused on one of the options that can be used when specifying the element to act as a tab container - the select event. When a tab is clicked, we need to retrieve data relating to the Make of car that the tab represents. The data retrieval will be performed by AJAX. The following code shows how the initial Javascript is embellished to register an event handler on the click of a tab, and the method that gets called to obtain the data:
var make;
$(function() {
var $tabs = $("#content").tabs({
select: function(e, ui) {
var thistab = ui.index;
$("#tab" + thistab).html(getCars(thistab));
}
});
});
function getCars(thistab) {
switch (thistab) {
case 0:
make = "Ford";
break;
case 1:
make = "Toyota";
break;
case 2:
make = "Honda";
break;
case 3:
make = "Audi";
break;
}
$.ajax({
type: "POST",
url: "Services/CarService.asmx/GetCarsByMake",
data: "{make: '" + make + "'}",
contentType: "application/json; charset=utf-8",
dataType: "json",
success: function(response) {
var cars = (typeof response.d) == 'string' ? eval('(' + response.d + ')') : response.d;
for (var i = 0; i < cars.length; i++) {
$('#tab' + thistab).append('<p><strong>' + cars[i].Make + ' ' +
cars[i].Model + '</strong><br /> Year: ' +
cars[i].Year + '<br />Doors: ' +
cars[i].Doors + '<br />Colour: ' +
cars[i].Colour + '<br />Mileage: ' +
cars[i].Mileage + '<br />Price: £' +
cars[i].Price + '</p>');
}
}
});
}
Once the tabs are created, a callback is applied to the select (or tab click) event, which takes two arguments - the event object and a ui object. The ui object exposes a property called index, which holds the zero-based index of the tab that was clicked. This is used t0 identify the tab. It's also passed into the function that gets the data so that the right Make can be passed to the web service - once it has been run through a switch statement. Otherwise the getCars() method follows an almost identical pattern to previous calls to web services that I have covered.
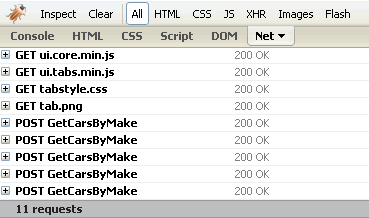
Running the page and clicking on the tabs shows that this works just fine, except that every time that a tab is clicked, the data is fetched anew.

What's need is a way to keep track of which tabs have been clicked to prevent unnecessary requests being made when they are clicked again. The modifications that achieve this are shown in bold:
var make;
var clicked = new Array();
$(function() {
var $tabs = $("#content").tabs({
select: function(e, ui) {
var thistab = ui.index;
$("#tab" + thistab).html(getCars(thistab));
}
});
});
function getCars(thistab) {
for (var x in clicked) {
if (clicked[x] == thistab)
return;
}
switch (thistab) {
case 0:
make = "Ford";
break;
case 1:
make = "Toyota";
break;
case 2:
make = "Honda";
break;
case 3:
make = "Audi";
break;
}
$.ajax({
type: "POST",
url: "Services/CarService.asmx/GetCarsByMake",
data: "{make: '" + make + "'}",
contentType: "application/json; charset=utf-8",
dataType: "json",
success: function(response) {
var cars = (typeof response.d) == 'string' ? eval('(' + response.d + ')') : response.d;
for (var i = 0; i < cars.length; i++) {
$('#tab' + thistab).append('<p><strong>' + cars[i].Make + ' ' +
cars[i].Model + '</strong><br /> Year: ' +
cars[i].Year + '<br />Doors: ' +
cars[i].Doors + '<br />Colour: ' +
cars[i].Colour + '<br />Mileage: ' +
cars[i].Mileage + '<br />Price: £' +
cars[i].Price + '</p>');
}
clicked.push(thistab);
}
});
}
An array is created to store the index of the tab that has been clicked. At the beginning of the getCars() method, a check is made to see if the tab that has been clicked is already in the array. If it is, the request is aborted by the use of the return statement. If not, the data is obtained, and finally the tab index is added to the array, thus ensuring that when it is clicked again, data is not retrieved.
To see this in action, go to the demo.
Date Created: 02/03/2009 07:30:25
Date Last Amended: 02/03/2009 07:36:43
Posted By: Mikesdotnetting
Total Views to date: 10583
'프로그래밍 > jQuery 👍' 카테고리의 다른 글
| jQuery Snippet - Useful Form Selectors (0) | 2009.09.04 |
|---|---|
| jQuery 와 webservice 의 json 통신하기 (DropDownList) (0) | 2009.09.01 |
| 웹페이지 레이아웃을 jQuery 로 쉽게 생성하기(6개 사이트) (0) | 2009.06.18 |
| JQuery란? (1) | 2009.06.03 |
| Upload Multiple Files in ASP.NET using jQuery (6) | 2009.05.22 |