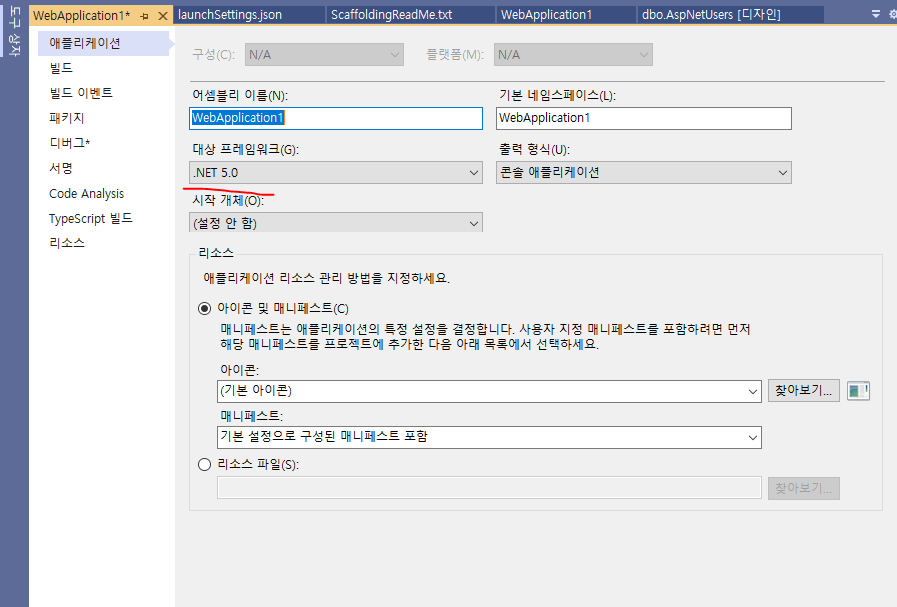
.net 5.0 : asp.net core 5 웹사이트 만들어보기 (EntityFrameworkCore 포함)
ASP.NET CORE 5 로 웹프로젝트 MVC 형태로 하나 만듭니다.
기존 데이터베이스와 마이그래이션한 것을 삭제합니다.
PM> Drop-Database
PM> Remove-Migration
이제 수정을 해보죠.
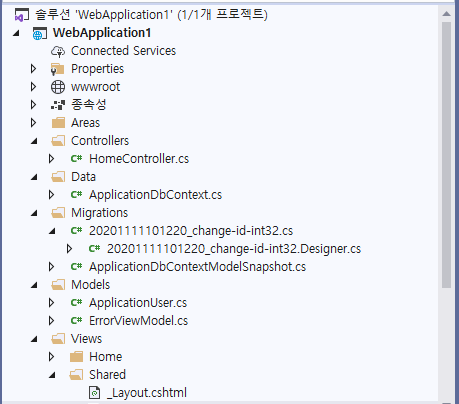
Models > ApplicationUser.cs 라는 클래스를 하나 만듭니다.

using Microsoft.AspNetCore.Identity;
using System;
using System.Collections.Generic;
using System.Linq;
using System.Threading.Tasks;

namespace WebApplication1.Models
{
    public class ApplicationUser : IdentityUser<int>
    {
    }
}
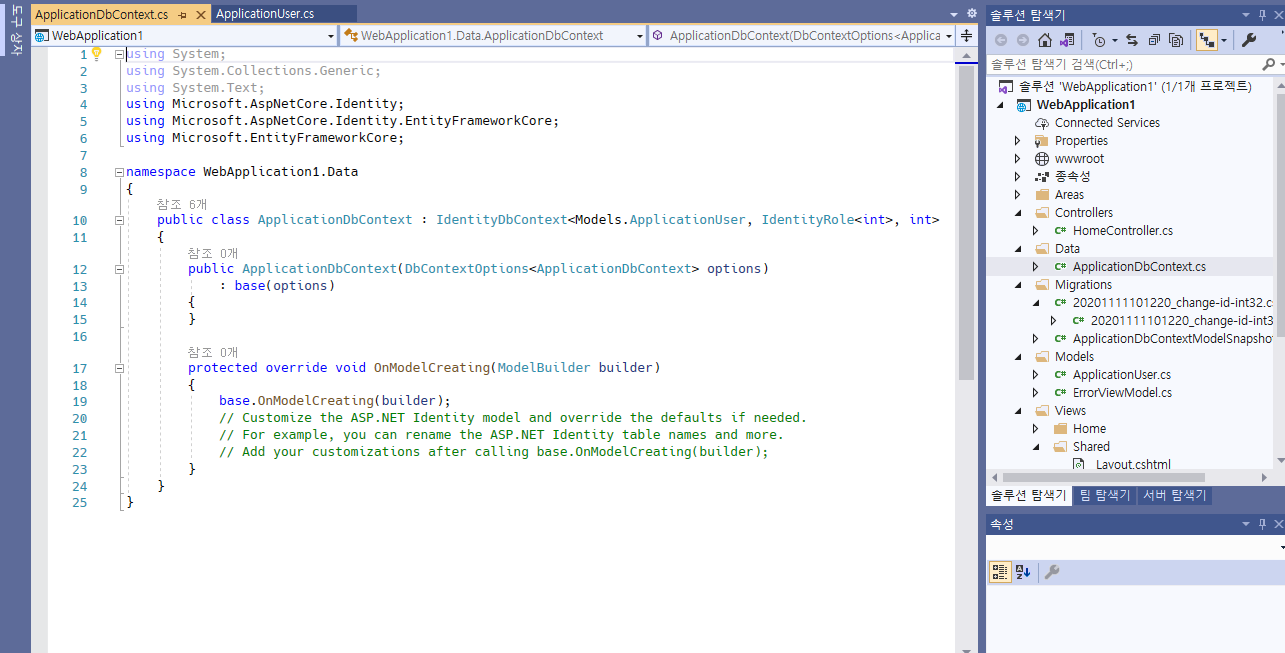
Data > ApplicationDbContext.cs 의 내용물을 수정합니다.
using System;
using System.Collections.Generic;
using System.Text;
using Microsoft.AspNetCore.Identity;
using Microsoft.AspNetCore.Identity.EntityFrameworkCore;
using Microsoft.EntityFrameworkCore;

namespace WebApplication1.Data
{
    public class ApplicationDbContext : IdentityDbContext<Models.ApplicationUser, IdentityRole<int>, int>
    {
        public ApplicationDbContext(DbContextOptions<ApplicationDbContext> options)
            : base(options)
        {
        }

        protected override void OnModelCreating(ModelBuilder builder)
        {
            base.OnModelCreating(builder);
            // Customize the ASP.NET Identity model and override the defaults if needed.
            // For example, you can rename the ASP.NET Identity table names and more.
            // Add your customizations after calling base.OnModelCreating(builder);
        }
    }
}
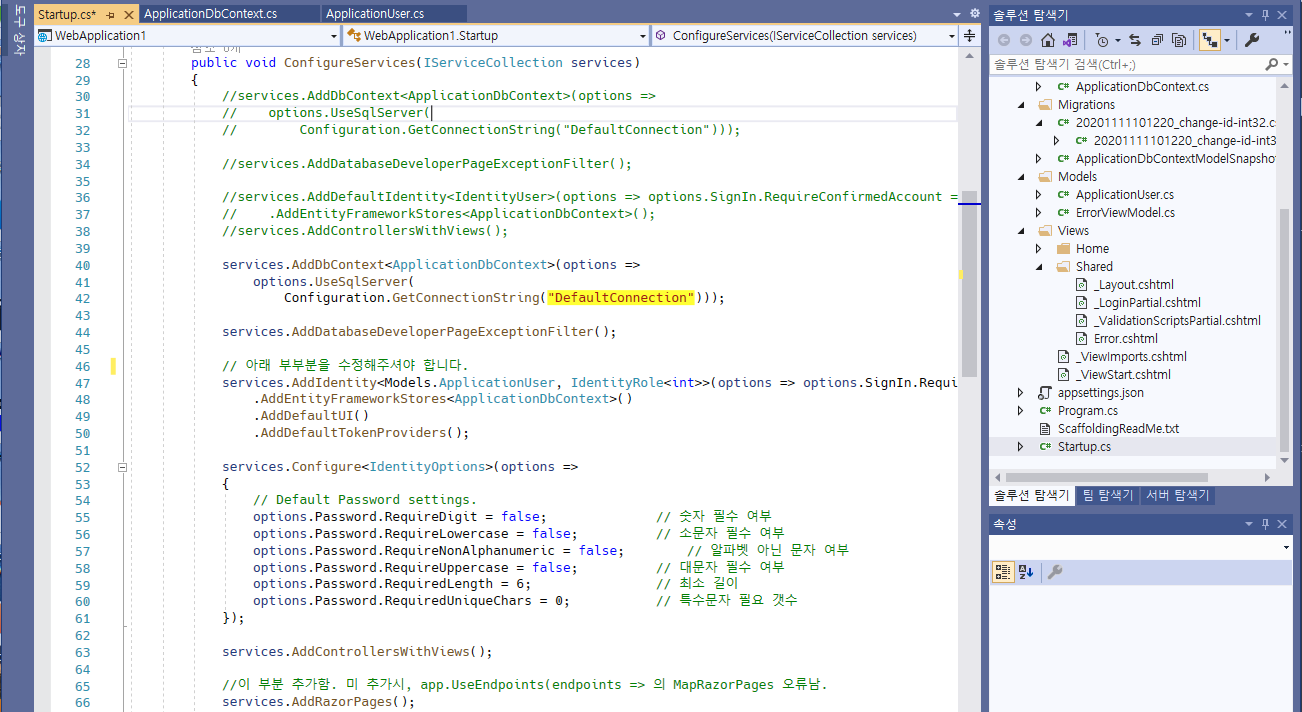
Startup.cs 를 수정합니다. 기존의 AddDefaultIdentity 를 버리고 새로 만든 모델을 위해 AddIdentity 를 사용합니다.
기존 코드에서 추가 및 변경된 부분은 주석으로 설명되어 있습니다.
using Microsoft.AspNetCore.Builder;
using Microsoft.AspNetCore.Hosting;
using Microsoft.AspNetCore.HttpsPolicy;
using Microsoft.AspNetCore.Identity;
using Microsoft.AspNetCore.Identity.UI;
using Microsoft.EntityFrameworkCore;
using Microsoft.Extensions.Configuration;
using Microsoft.Extensions.DependencyInjection;
using Microsoft.Extensions.Hosting;
using System;
using System.Collections.Generic;
using System.Linq;
using System.Threading.Tasks;
using WebApplication1.Data;

namespace WebApplication1
{
    public class Startup
    {
        public Startup(IConfiguration configuration)
        {
            Configuration = configuration;
        }

        public IConfiguration Configuration { get; }

        // This method gets called by the runtime. Use this method to add services to the container.
        public void ConfigureServices(IServiceCollection services)
        {
            //services.AddDbContext<ApplicationDbContext>(options =>
            //    options.UseSqlServer(
            //        Configuration.GetConnectionString("DefaultConnection")));

            //services.AddDatabaseDeveloperPageExceptionFilter();

            //services.AddDefaultIdentity<IdentityUser>(options => options.SignIn.RequireConfirmedAccount = true)
            //    .AddEntityFrameworkStores<ApplicationDbContext>();
            //services.AddControllersWithViews();

            services.AddDbContext<ApplicationDbContext>(options =>
                options.UseSqlServer(
                    Configuration.GetConnectionString("DefaultConnection")));

            services.AddDatabaseDeveloperPageExceptionFilter();

            // 아래 부부분을 수정해주셔야 합니다.
            services.AddIdentity<Models.ApplicationUser, IdentityRole<int>>(options => options.SignIn.RequireConfirmedAccount = false)
                .AddEntityFrameworkStores<ApplicationDbContext>()
                .AddDefaultUI()
                .AddDefaultTokenProviders();

            //이 부분 추가함.
            services.Configure<IdentityOptions>(options =>
            {
                // Default Password settings.
                options.Password.RequireDigit = false;              // 숫자 필수 여부
                options.Password.RequireLowercase = false;          // 소문자 필수 여부
                options.Password.RequireNonAlphanumeric = false;        // 알파벳 아닌 문자 여부
                options.Password.RequireUppercase = false;          // 대문자 필수 여부
                options.Password.RequiredLength = 6;                // 최소 길이
                options.Password.RequiredUniqueChars = 0;           // 특수문자 필요 갯수
            });

            services.AddControllersWithViews();

            //이 부분 추가함. 미 추가시, app.UseEndpoints(endpoints => 의 MapRazorPages 오류남.
            services.AddRazorPages();
        }

        // This method gets called by the runtime. Use this method to configure the HTTP request pipeline.
        public void Configure(IApplicationBuilder app, IWebHostEnvironment env)
        {
            if (env.IsDevelopment())
            {
                app.UseDeveloperExceptionPage();
                app.UseMigrationsEndPoint();
            }
            else
            {
                app.UseExceptionHandler("/Home/Error");
                // The default HSTS value is 30 days. You may want to change this for production scenarios, see https://aka.ms/aspnetcore-hsts.
                app.UseHsts();
            }
            app.UseHttpsRedirection();
            app.UseStaticFiles();

            app.UseRouting();

            app.UseAuthentication();
            app.UseAuthorization();

            app.UseEndpoints(endpoints =>
            {
                endpoints.MapControllerRoute(
                    name: "default",
                    pattern: "{controller=Home}/{action=Index}/{id?}");
                endpoints.MapRazorPages();
            });
        }
    }
}
Views > Shared > _LoginPartical.cshtml 을 수정합니다.
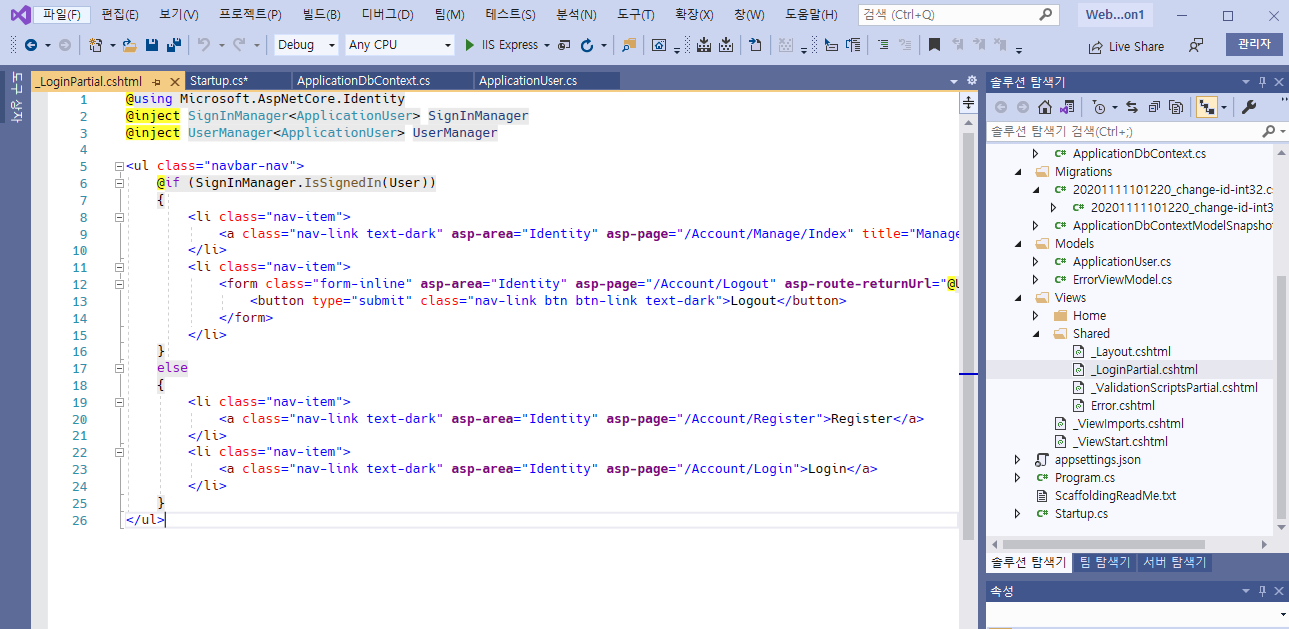
@using Microsoft.AspNetCore.Identity
@inject SignInManager<ApplicationUser> SignInManager
@inject UserManager<ApplicationUser> UserManager
오류가 나면 기본적으로 IdentityUser 라는 문자열을 Models.ApplicationUser 로 변경하신다고 보시면 됩니다.
수정한 코드를 통해 마이그래이션을 합니다.
PM> Add-Migration chanage-id-int32
Migrations 폴더 하단에 생긴 클래스가 자동 생성되었습니다.
데이터베이스에 적용해 줍니다.
PM> Update-Database
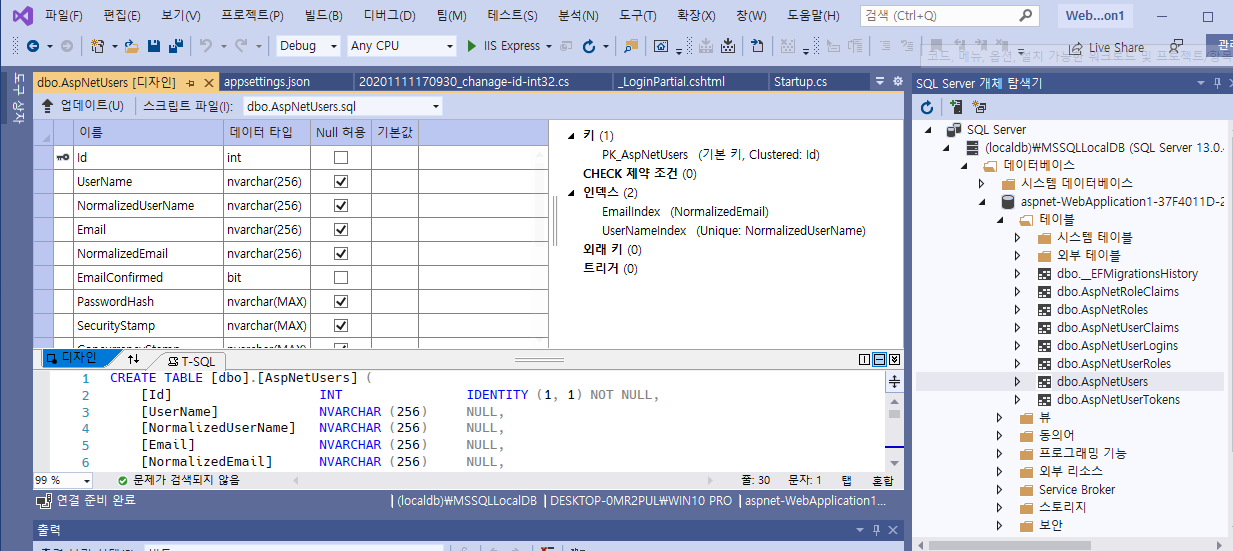
메뉴에서 보기 - SQL Server 개체 탐색기 창을 띄워서 database 의 테이블을 확인하시면 변경된 id 가 int 형태로 되어 있는 것을 확인할 수가 있습니다.
이름 필드 추가하기
1. ApplicationUser.cs 이름 Name 필드 추가
using Microsoft.AspNetCore.Identity;
using System;
using System.Collections.Generic;
using System.Linq;
using System.Threading.Tasks;

namespace WebApplication1.Models
{
    public class ApplicationUser : IdentityUser<int>
    {
        public string Name { get; set; } = "";
    }
}
패키지 관리자 콘솔에 실행합니다.
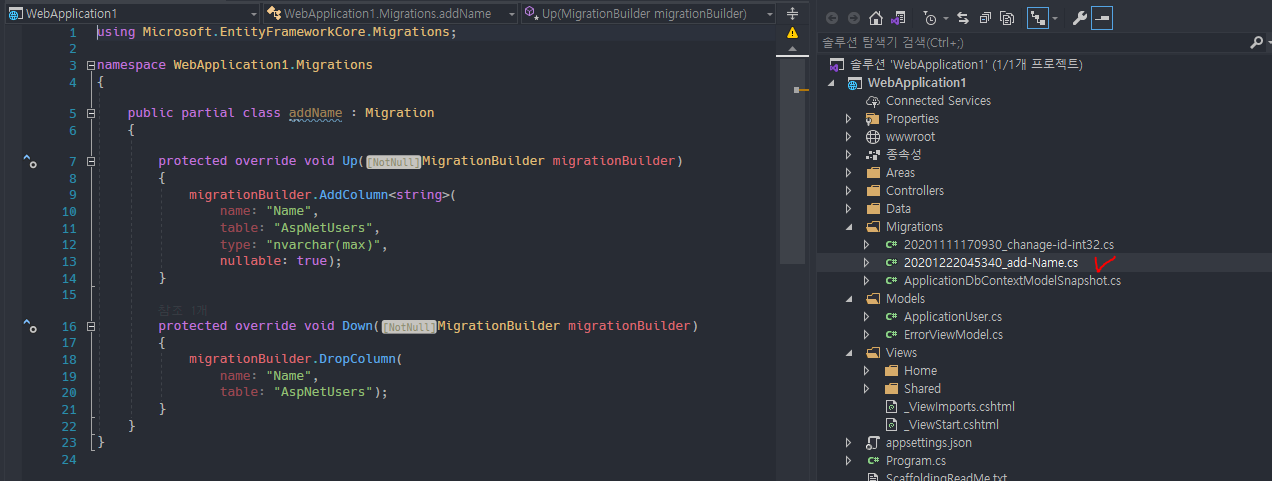
PM> Add-Migration add-Name
실행하면 자동적으로 Name 필드에 대한 Migation 클래스가 생성됩니다. 이제 이를 실행해서 database 에 반영해 보죠.
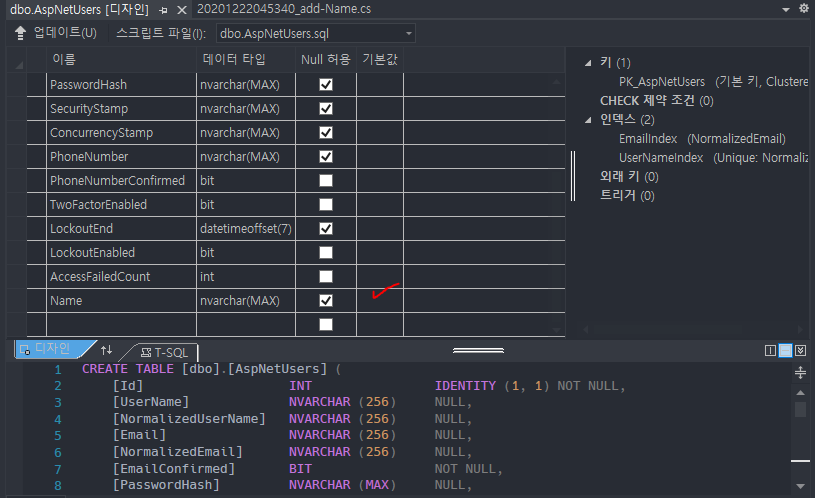
PM> Update-Database
SQL SERVER 개체 탐색기에서 AspNetUsers 테이블에 추가된 Name 필드가 생성된것을 보실 수 있습니다.
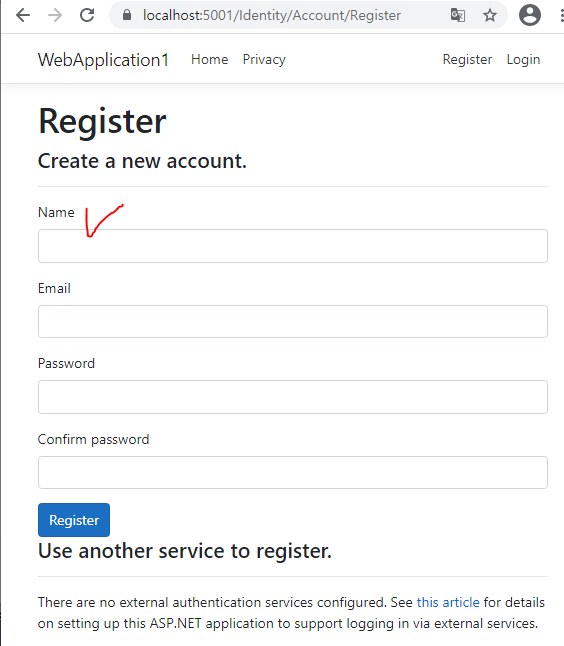
사용자 추가 화면에 새롭게 추가한 이름(Name)을 기재하기 위해서는 Register.cshtml.cs 에 아래와 같이 Name 속성을 기재해 줍니다.
[Required]
[Display(Name = "Name")]
public string Name { get; set; }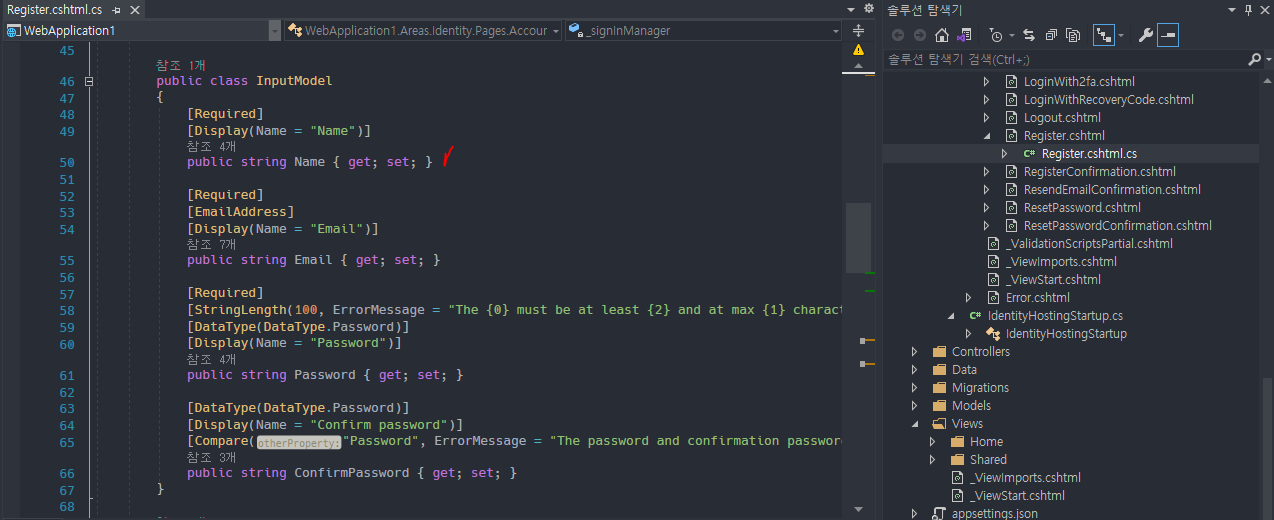
Register.cshtml 뷰단에서도 이름 표기를 위한 작업을 아래와 같이 해줍니다.
<div class="form-group">
  <label asp-for="Input.Name"></label>
  <input asp-for="Input.Name" class="form-control" />
  <span asp-validation-for="Input.Name" class="text-danger"></span>
</div>
이제 저장버튼을 통해 submit 하게 되면 OnPostAsync() 함수를 통해 실행되는데요. Name = Input.Name 을 추가하여 이름도 저장되게끔 처리 해 줍니다.
var user = new Models.ApplicationUser { Name = Input.Name, UserName = Input.Email, Email = Input.Email };
OnPostAsync() 코드
        public async Task<IActionResult> OnPostAsync(string returnUrl = null)
        {
            returnUrl ??= Url.Content("~/");
            ExternalLogins = (await _signInManager.GetExternalAuthenticationSchemesAsync()).ToList();
            if (ModelState.IsValid)
            {
                //여기 Name = Input.Name, 을 추가함.
                var user = new Models.ApplicationUser { Name = Input.Name, UserName = Input.Email, Email = Input.Email };
                var result = await _userManager.CreateAsync(user, Input.Password);
                if (result.Succeeded)
                {
                    _logger.LogInformation("User created a new account with password.");

                    var code = await _userManager.GenerateEmailConfirmationTokenAsync(user);
                    code = WebEncoders.Base64UrlEncode(Encoding.UTF8.GetBytes(code));
                    var callbackUrl = Url.Page(
                        "/Account/ConfirmEmail",
                        pageHandler: null,
                        values: new { area = "Identity", userId = user.Id, code = code, returnUrl = returnUrl },
                        protocol: Request.Scheme);

                    await _emailSender.SendEmailAsync(Input.Email, "Confirm your email",
                        $"Please confirm your account by <a href='{HtmlEncoder.Default.Encode(callbackUrl)}'>clicking here</a>.");

                    if (_userManager.Options.SignIn.RequireConfirmedAccount)
                    {
                        return RedirectToPage("RegisterConfirmation", new { email = Input.Email, returnUrl = returnUrl });
                    }
                    else
                    {
                        await _signInManager.SignInAsync(user, isPersistent: false);
                        return LocalRedirect(returnUrl);
                    }
                }
                foreach (var error in result.Errors)
                {
                    ModelState.AddModelError(string.Empty, error.Description);
                }
            }

            // If we got this far, something failed, redisplay form
            return Page();
        }
이름 필드 수정하기
이제 수정도 해볼까요?
\WebApplication1\Areas\Identity\Pages\Account\Manage\Index.cshtml.cs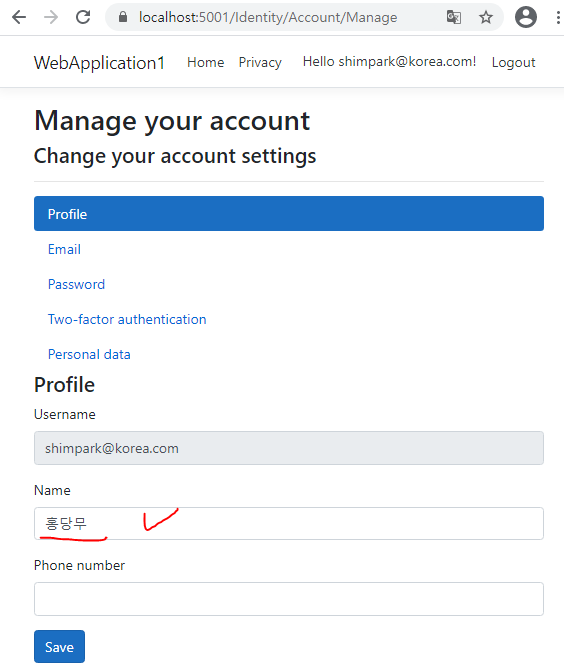
Index.cshtml.cs 에서 이름을 수정입력할 수 있도록 InputModel 에 Name 속성을 추가합니다.
        public class InputModel
        {
            [Display(Name = "Name")]
            public string Name { get; set; }

            [Phone]
            [Display(Name = "Phone number")]
            public string PhoneNumber { get; set; }
        }
뷰단에서도 작업합니다.
\WebApplication1\Areas\Identity\Pages\Account\Manage\Index.cshtml <form id="profile-form" method="post">
<div asp-validation-summary="ModelOnly" class="text-danger"></div>
<div class="form-group">
<label asp-for="Username"></label>
<input asp-for="Username" class="form-control" disabled />
</div>
<!-- 추가된 시작 부분-->
<div class="form-group">
<label asp-for="Input.Name"></label>
<input asp-for="Input.Name" class="form-control" />
<span asp-validation-for="Input.Name" class="text-danger"></span>
</div>
<!-- 추가된 끝 부분-->
<div class="form-group">
<label asp-for="Input.PhoneNumber"></label>
<input asp-for="Input.PhoneNumber" class="form-control" />
<span asp-validation-for="Input.PhoneNumber" class="text-danger"></span>
</div>
<button id="update-profile-button" type="submit" class="btn btn-primary">Save</button>
</form>저장된 이름을 Name 의 input box 에 할당하는 방법입니다. 사용자 정보의 model 을 GetUserAsync() 함수를 통해 가져와서 InputModel 클래스에 할당하면 알아서 이름 값을 보여줍니다.
        private async Task LoadAsync(Models.ApplicationUser user)
        {
            //사용자 정보 가져오기
            var modelUser = await _userManager.GetUserAsync(User);
            var userName = await _userManager.GetUserNameAsync(user);
            var phoneNumber = await _userManager.GetPhoneNumberAsync(user);

            Username = userName;

            Input = new InputModel
            {
                PhoneNumber = phoneNumber,
                Name = modelUser.Name //Name 값 할당하기
            };
        }
이제 수정화면의 저장부분 함수인 OnPostAsync() 함수인데요. 인증한 사용자의 정보의 model 인 user 에 변경된 이름을 할당해 주면 UpdateAsync() 함수를 통해 entity framework 가동하여 database 에 수정저장하게 됩니다.
        public async Task<IActionResult> OnPostAsync()
        {
            var user = await _userManager.GetUserAsync(User);
            if (user == null)
            {
                return NotFound($"Unable to load user with ID '{_userManager.GetUserId(User)}'.");
            }

            if (!ModelState.IsValid)
            {
                await LoadAsync(user);
                return Page();
            }

            var phoneNumber = await _userManager.GetPhoneNumberAsync(user);
            if (Input.PhoneNumber != phoneNumber)
            {
                var setPhoneResult = await _userManager.SetPhoneNumberAsync(user, Input.PhoneNumber);
                if (!setPhoneResult.Succeeded)
                {
                    StatusMessage = "Unexpected error when trying to set phone number.";
                    return RedirectToPage();
                }
            }

            //Name 추가 필드 업데이트하기
            if (Input.Name != user.Name)
            {
                user.Name = Input.Name;
            }

            //업데이트 하기
            await _userManager.UpdateAsync(user);

            await _signInManager.RefreshSignInAsync(user);
            StatusMessage = "Your profile has been updated";
            return RedirectToPage();
        }
참고자료
ASP.NET Core 프로젝트에서 사용자 데이터 추가, 다운로드 및 삭제 Identity
ASP.NET Core 프로젝트에서에 사용자 지정 사용자 데이터를 추가 하는 방법에 대해 알아봅니다 Identity . GDPR 당 데이터를 삭제 합니다.
docs.microsoft.com
'닷넷관련 > ASP.NET CORE 🍔' 카테고리의 다른 글
| ASP.NET 5.0 WEB API 에 OData 구축 적용해보기 (2) | 2020.12.28 |
|---|---|
| JWT Auth 데모 (Angular + ASP.NET Core 3.1 or 5.0) (0) | 2020.12.10 |
| 서버 앱에서 .NET 5 과 .NET Framework 비교 (0) | 2020.11.10 |
| ASP.NET Core 에서 GraphQL 시작해 보기 (0) | 2020.08.03 |
| ASP.NET Core Blazor 소개 (.NET Core 3.1 SDK 이상) (0) | 2020.06.23 |